Yuktix PCB Debugging
When things go wrong, we need to get debug logs from the devices and send it to support for troubleshooting. All Yuktix PCB provide useful information about operations on the DEBUG PORT. When extra tracing is needed, a debug version of the hex file can be loaded. To get debug messages, we need a serial cable to connect to the debug port of the PCB (refer to pcb guides) and a serial terminal on the PC.
Cable connection
We recommend using FTDI USB-RS232-WE cable. This cable has USB on one end and 4-wire pigtails on the other end. The 4-wire pigtails are color coded. The details of the DEBUG PORT are available in individual PCB guides.
| Red | Vcc | NC | Do not connect | |
| Orange | |
Tx | MCU Rx | |
| Yellow | |
Rx | MCU Tx | |
| Black | |
GND |
Setup Serial terminal on PC
We recommend using termite software on the PC. You can use any other serial terminal too but then you have to translate the instructions for the tool of your choice. You can download termite from their website. Here is an annotated screenshot of Termite application screen on PC showing useful features.

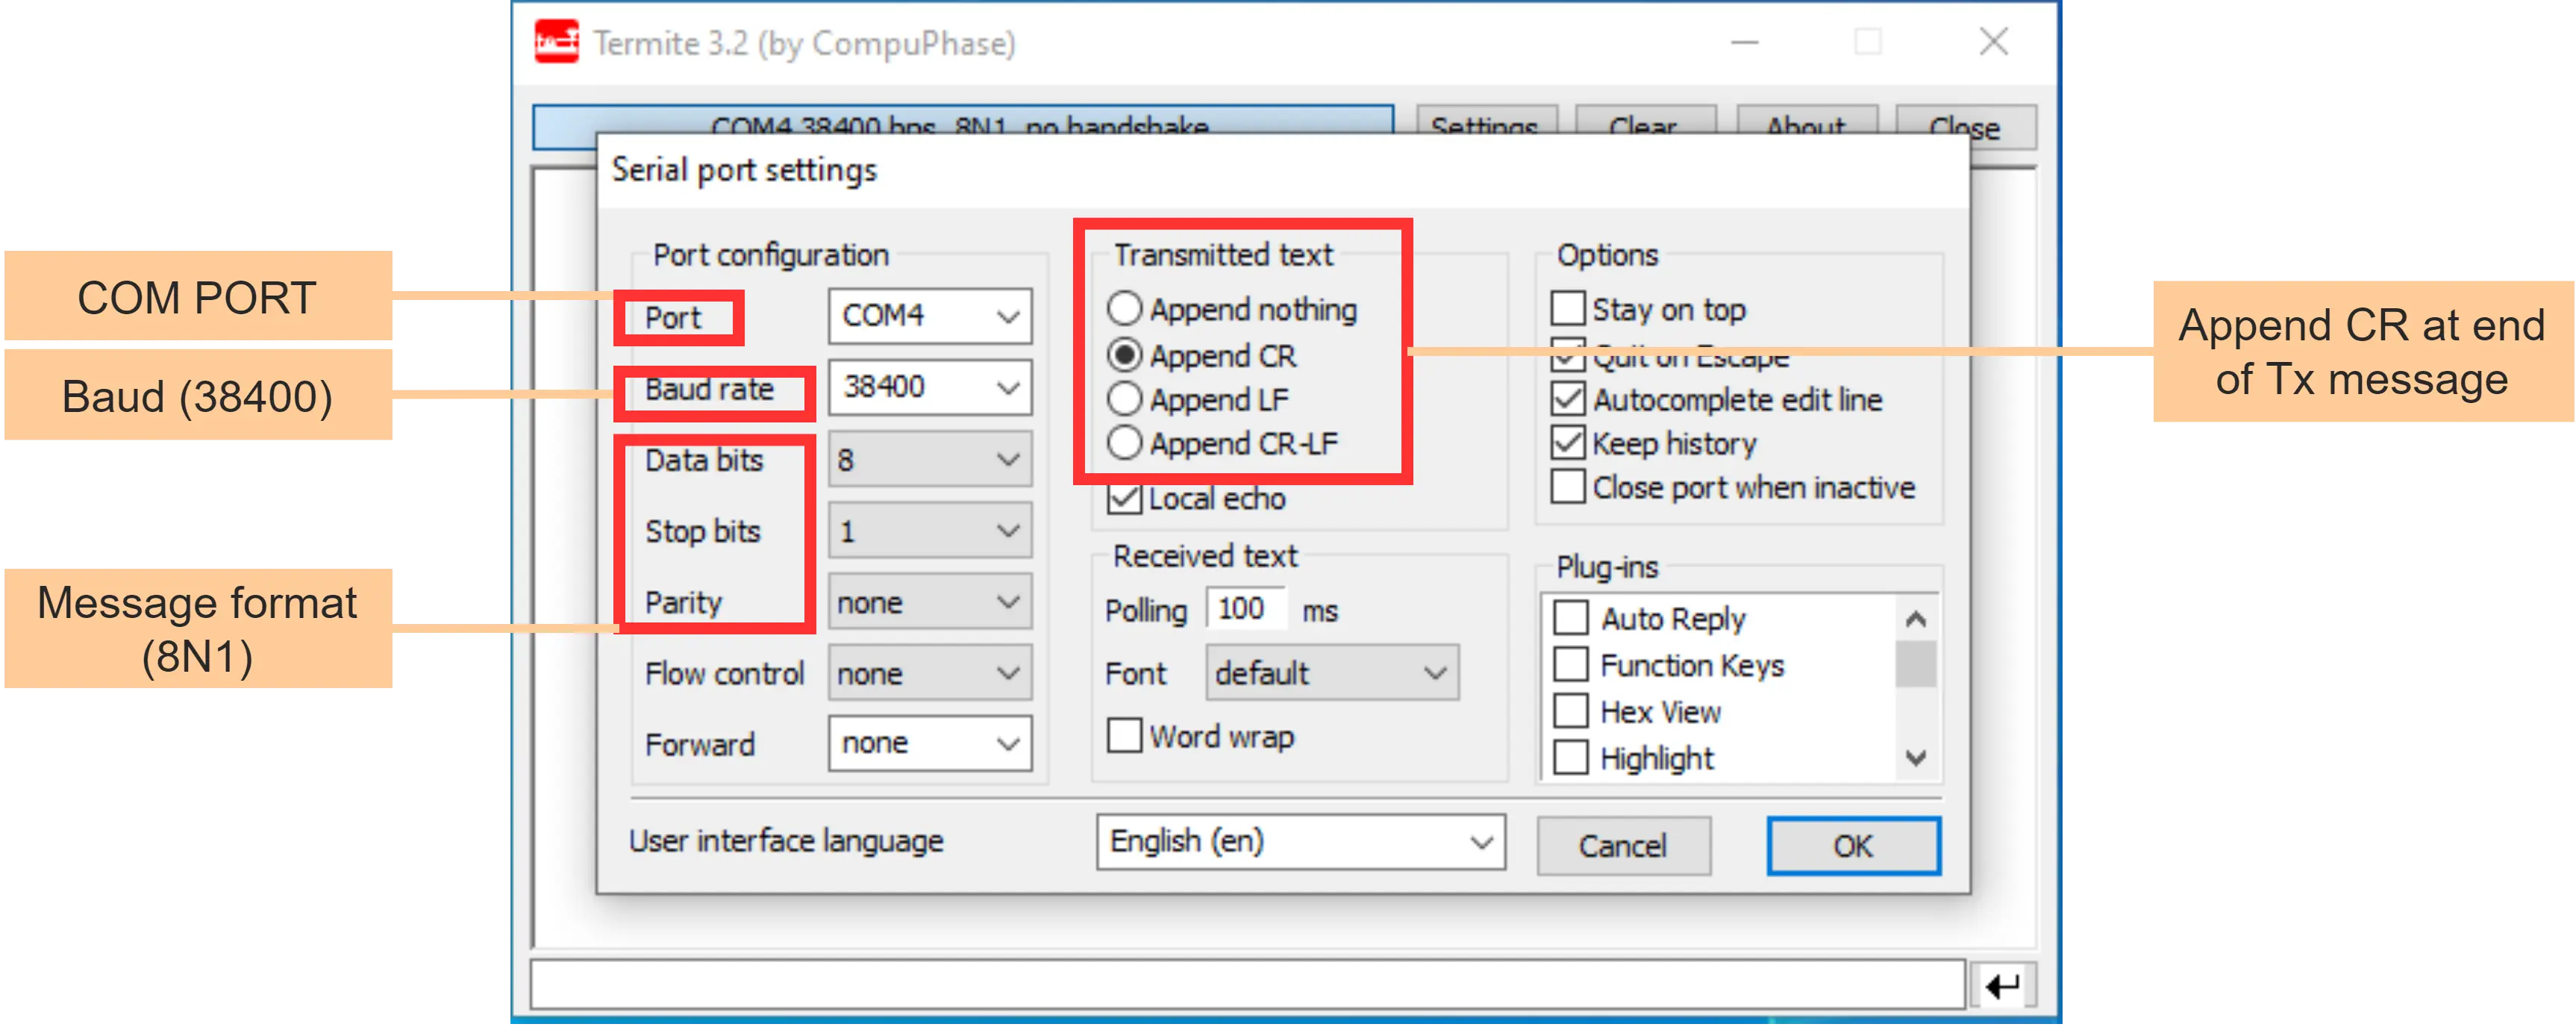
- set the baud rate to 38400
- set communication for 8N1 data
- select the appropriate port for communication
Steps to communicate
- Check the details of DEBUG PORT in PCB pinout diagram
- Connect DEBUG cable to the device debug port like explained above
- Power ON the PCB
- Connect DEBUG cable to your PC
- Find COM port of USB cable in your device drivers window
- Open Termite and set PORT and change baud rate to 38400. set communication for 8N1
- Press reset and you should see message from yuktix logger program.